Introduction
If your organization has a Microsoft 365 work or school subscription or uses SharePoint Server 2019 and Teams, you can sync your Microsoft SharePoint and Teams files to a folder on your computer. This lets you work directly in File Explorer and access files even when you’re offline. And when you go back online, any changes made to those files will sync automatically.
In this blog we are providing the steps to enable sync to OneDrive for your account.
Requirements
To set up a Microsoft Teams sync to OneDrive, you must have the following
- The latest version of the Microsoft Teams app installed on your computer
- You can also set up syncing using the web-based version of Teams
- The latest version of the Microsoft OneDrive app installed on your computer
- Your computer should be managed, secured and onboarded
Set up the Team file share sync
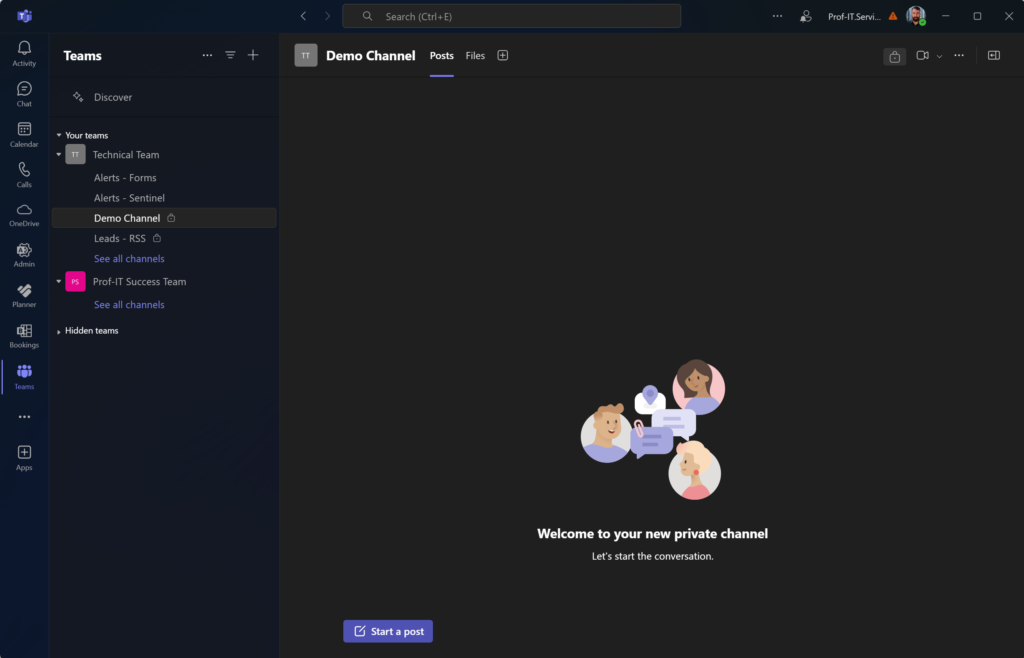
- Open Microsoft Teams on your computer, and if you are prompted to log in, provide your Microsoft 365 team credentials.Click Teams on the launch bar to open up the Teams you are a member of.Click the Team that stores shared files. Here we are choosing the Microsoft Teams installed on the local computer.

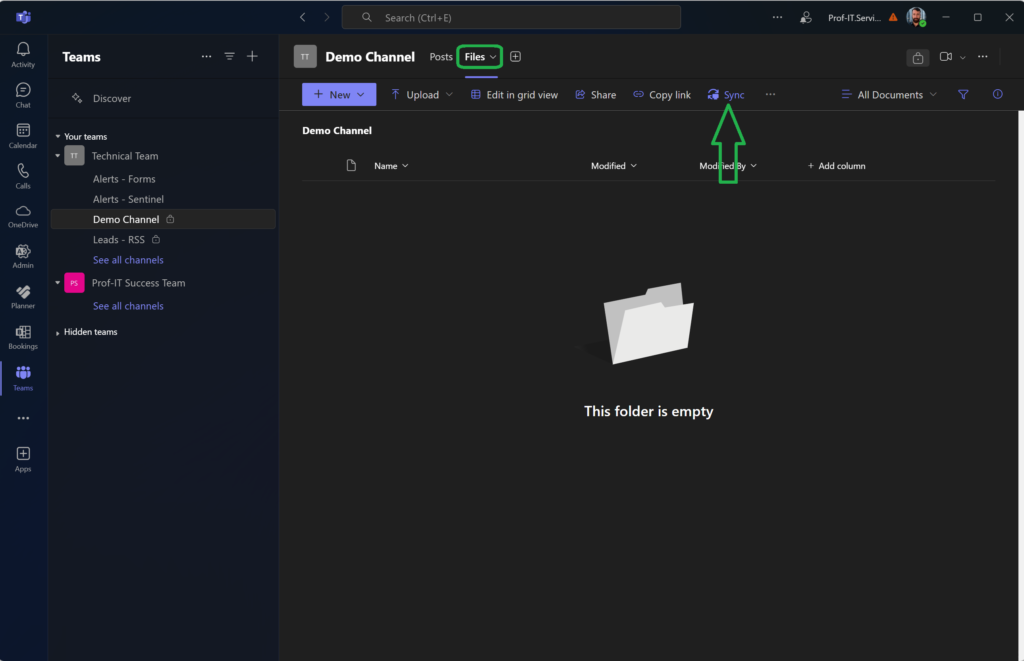
2. Open the file location on your Team channel, choose the file and select the sync option available under the three dots as shown in the below picture. Here it is marked in a red box.

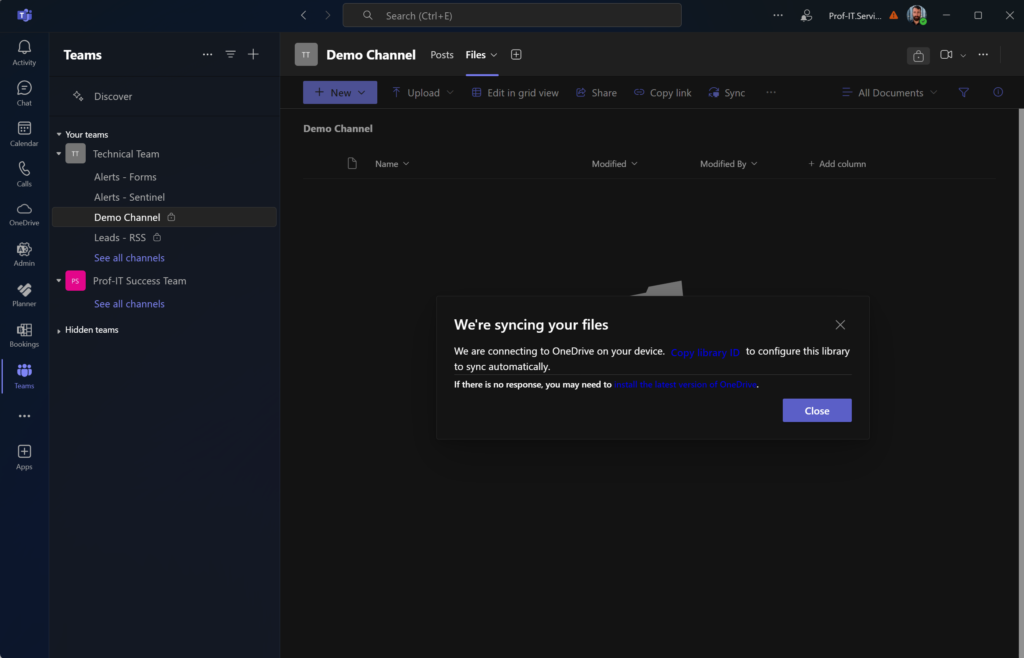
3. The OneDrive client will now sync the folder to your computer.

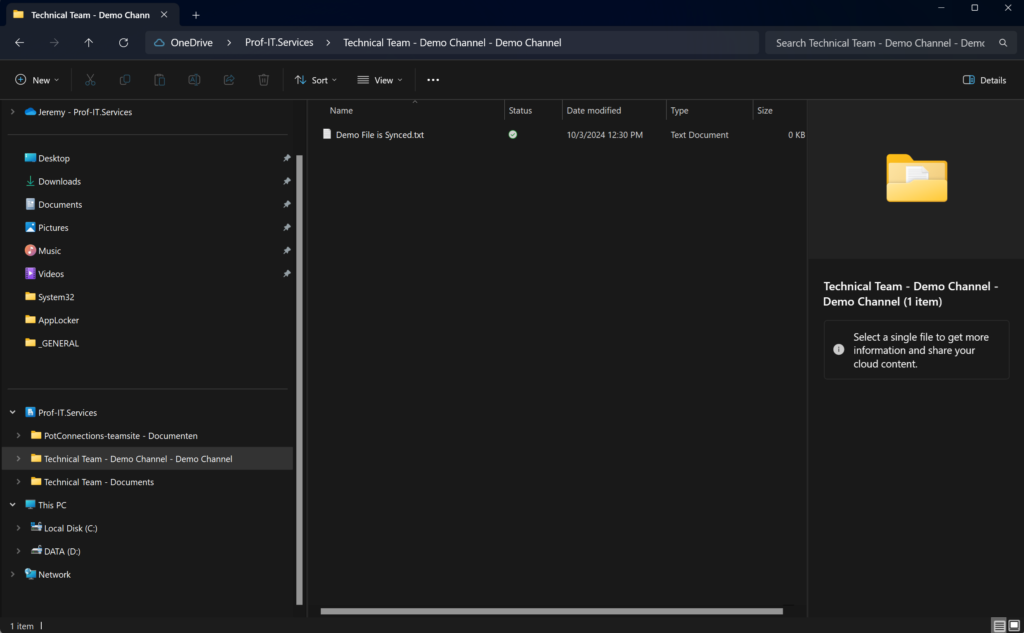
4. You can now open the files in File explorer to make changes offline, and the updated content will be synchronized in the subsequent sync process.

Conclusion
To get work done from anywhere, across your devices, you need ubiquitous access to all your files – online and offline. Business information needs to be up to date and in reach, without compromise. OneDrive enables you to synchronize your content to your PC and any other devices such as Mobile, Tab and Mac so you can easily and securely access files anytime—even when you are offline.

